You can power the cooler directly off a 12V battery or by using an AC adapter. The peltier is 40Watts and operates at a maximum of 4 amps. Normal current draw is about 3.5 amps. At maximum current, a 100 AH marine battery would provide 24 hours of cooling time. There is no on/off switch for the cooler. You can turn it on and off by plugging and unplugging its power cord. The green LED light on the plastic box located on the conduit/cable will glow when the cooler is powered and the external and internal fans will operate.
Also enclosed is a humidity indicator card and indicating gel desiccant packs. The yellow beads will turn dark green when the gel is 60% absorbed. I keep both inside the cooling chamber when cooling.
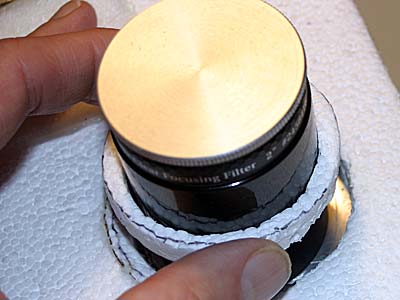
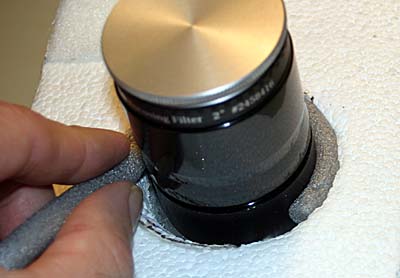
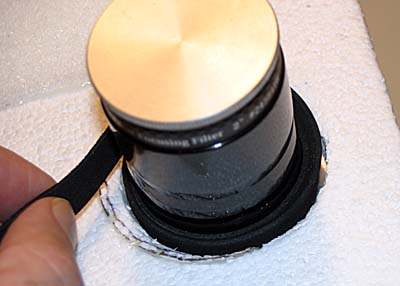
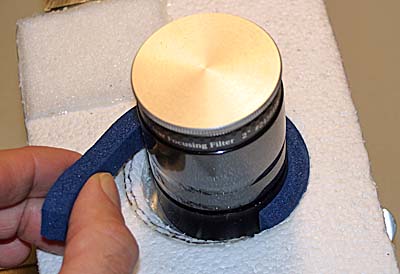
I've also included an assortment of gasket material for the front 2" nosepiece or focal reducer to be used. I've sized the front hole in the styrofoam panel for 65mm. It can be enlarged if needed by light sanding with sandpaper. Below are some pics to show how the gaskets can be applied to fit whatever nosepiece or reducer you will be using. Also enclosed are some weather stripping strips that I've also used. You can experiment and see what works best for you.
Styrofoam ring gasket with 2" nosepiece:
Rope gasket:
Thin black gasket strips:
Thick blue gasket strip:
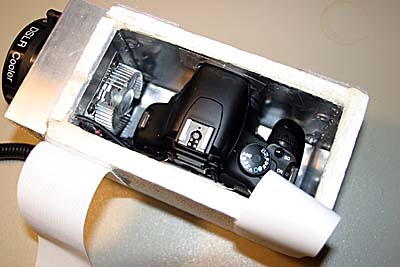
The USB cable is rated for USB 2.0 high speed data transfers and I've tested it with my cameras. The temperature probe is located inside the cooling chamber in the bottom corner. You can power your camera using its own battery or with an external adapter. If using an external power adapter, you will need to run it's cable under the lid of the cooler. If it is a thin cable like the one I use, it will easily fit under the lip of the lid and be well sealed by the lid's gasket material. The front styrofoam lip (nearest the heat sink/fan) is a soft styrofoam and can be indented or cut a little to accommodate the cable if needed. I would suggest placing the cable in the same position every time and in time, it will form its own indentation. All other cables have been run through the cooling chamber wall.
When placing the lid on the cooler, please notice that there is one correct orientation. Turn the lid upside down and you will see a small slot cut on one corner for the USB cable. Make sure that that lid corner goes over the correct corner of the cooler. Secure the lid by pressing down firmly and use the velcro straps to hold it in place. I also included a roll of masking tape. After I have the lid secured, I run the masking tape around the lid seam two times, just to help make a better seal. The masking tape is easy to remove and doesn't hurt the styrofoam panels. I'm surprised how well my styrofoam cooler has held up after five years of use.
Word of caution: Do not ever use super glue on the styrofoam panels. Super glue melts styrofoam. A good glue to use is 5-minute clear drying epoxy if you ever need to make a repair. "Great Stuff" expanding foam is also good to use to fill cracks or holes in the stryrofoam and can be easily cut to shape and sanded, but hopefully you'll never have to make a repair.
Here are some starting directions that may help when you first use your cooler:
1. Install T-ring on camera.
2. Connect cooler's USB cable to camera USB port. I place back electrical tape on the viewfinder and have the camera back display turned off.
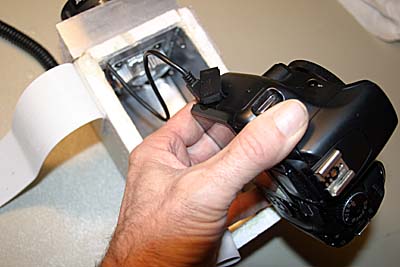
3. Place camera into cooling chamber and push flash nosepiece into indentation at front of cooling chamber.
4. Thread 2" nosepiece or reducer through front of cooler into camera body, but don't fully tighten:

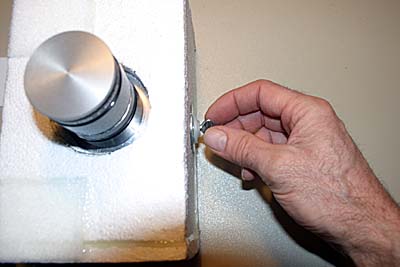
5. Insert thumbscrew and washers into bottom of cooler, but don't fully tighten:
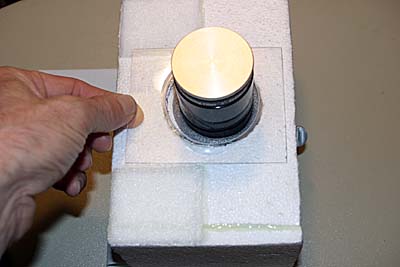
6. Position the nosepiece or reducer so that it is well centered and fully tighten it and fully tighten the bottom thumbscrew.
7. Place humidity indicator card and desiccant pack(s) inside cooling chamber.
8. Turn computer on and connect USB cable from the cooler to the computer.
9. Turn the camera switch to "ON" while in manual mode. Canon's "EOS Utility" software should start. Select "Canon EOS Utility". click "Camera settings/remote shooting".
10. Close lid and secure with velcro straps. If it is very humid, I heat the air inside the chamber with my dew gun (12V hair dryer) before closing the lid to clear out any condensation that may be inside. I like to seal the lid seam with masking tape.
11. For some telescope focusers/drawtubes, I like to use a hard flat surface on the front of the cooler where they make contact. I've included a clear plastic spacer for this purpose. In the correct orientation, it fits in between the two velcro strips as shown below:
After a cooled imaging session, I usually take a series of darks and then unplug the cooler, but keep the camera turned on for a few minutes. Keeping the camera powered after cool down allows the camera and the inside of the cooling chamber to warm up to near ambient temperature.
Dark skies,
Gary Honis