Modification Steps Continued:
30. The existing position of the sensor adjustment screws need to be marked because they adjust for perfect focus and tilt of the sensor. One way to do this is by making three gauge strips and marking the height of the plastic pins alongside all three sensor adjustment screws:
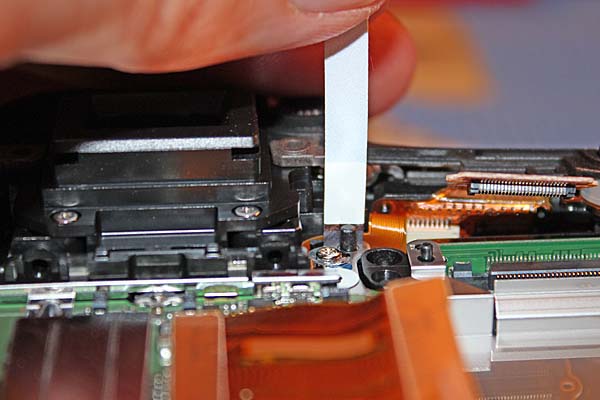
31. As an additional aid in returning the sensor adjustment screws to their original position, use a fine point marker to make a straight line from the center of each sensor adjustment screw and continue the line off the sensor screw:
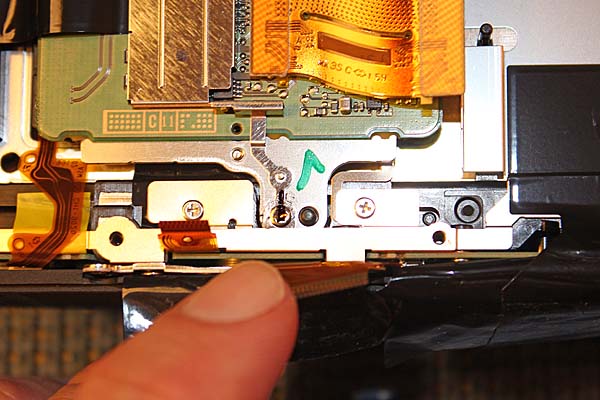
32. Lift the small foam piece aside to uncover a ground screw. Remove the ground screw and metal plate, note there is black tape under the plate:
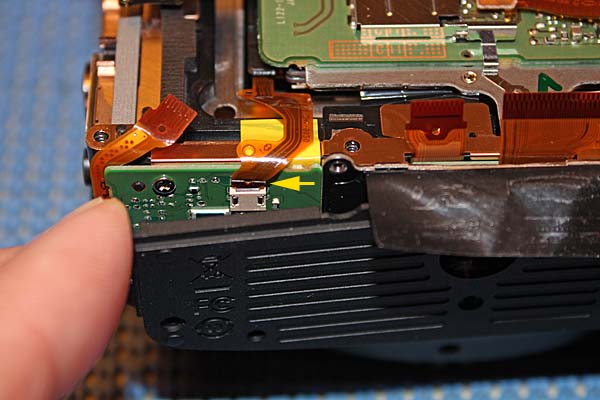
33. Remove small ribbon cable from its connector at the bottom of the camera using a toothpick. This is a slide out type connector:
34. Remove plastic bottom of camera:
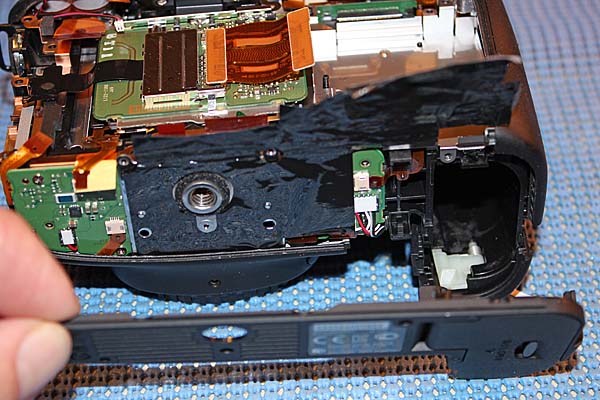
35. Remove four screws on bottom of camera. The two screws in the middle are larger than the two smaller screws on the sides:
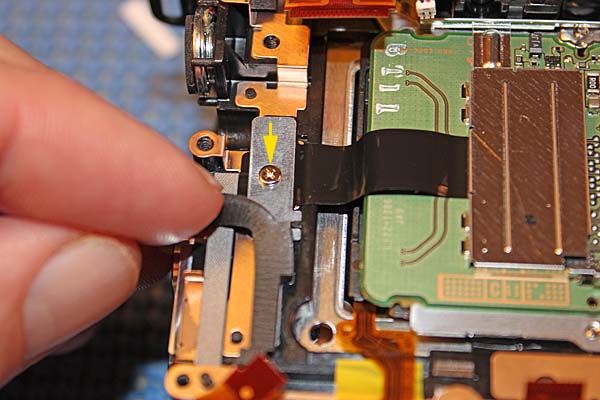
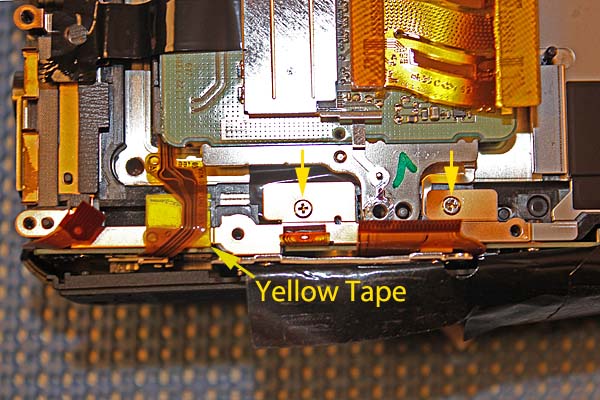
36. Remove two screws on copper ground strap. The left side of the ground strap is held in place with yellow tape that makes it difficult to remove. Use a wooden toothpick to unstick the yellow piece of tape from the copper ground strap and remove the ground strap:
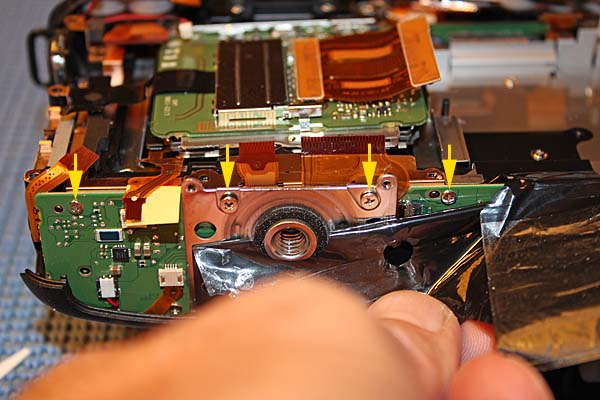
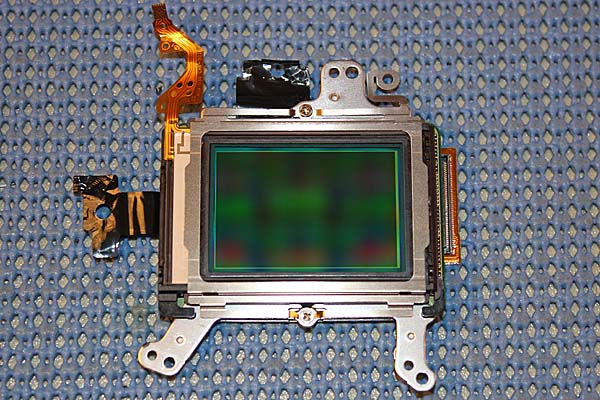
37. Remove image sensor assembly by removing the three sensor adjustment screws and label them so that they can be returned to their original positions:
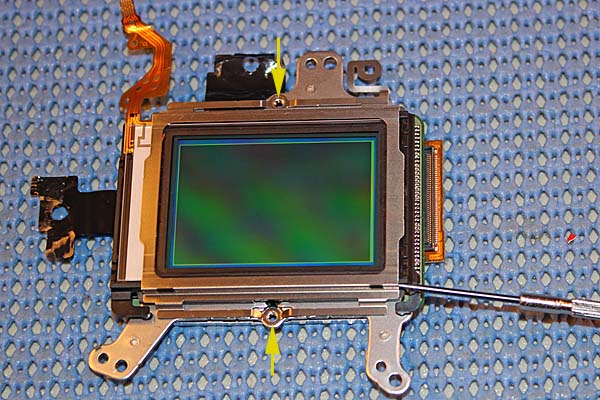
38. Remove two screws holding the LPF#1 filter frame onto the sensor assembly. Use a small flat head driver to lift up the metal filter frame at all four corners so that it clears each small black plastic catch, and remove the filter frame:
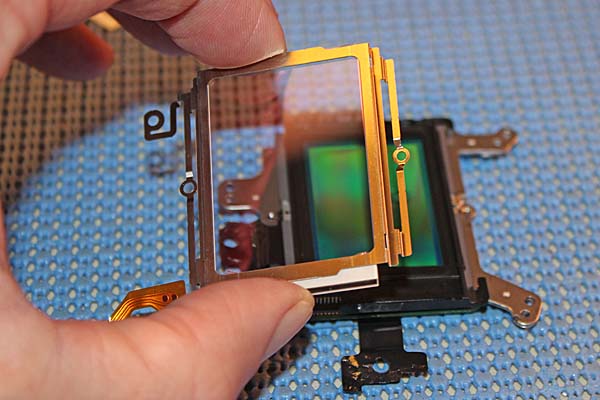
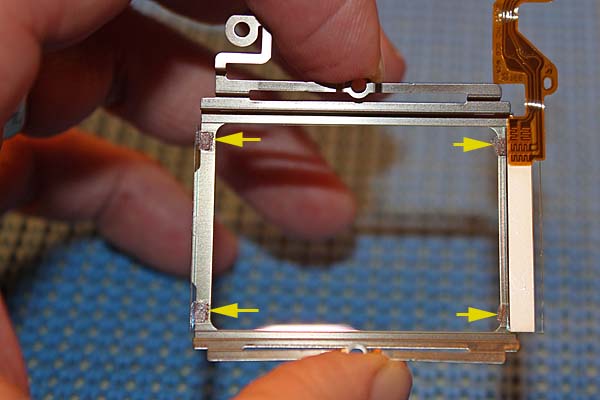
39. The front filter (LPF#1) has four spots of weak adhesive near each corner as shown. Use a razor knife to loosen each spot of glue and remove the LPF#1 glass from its metal frame:
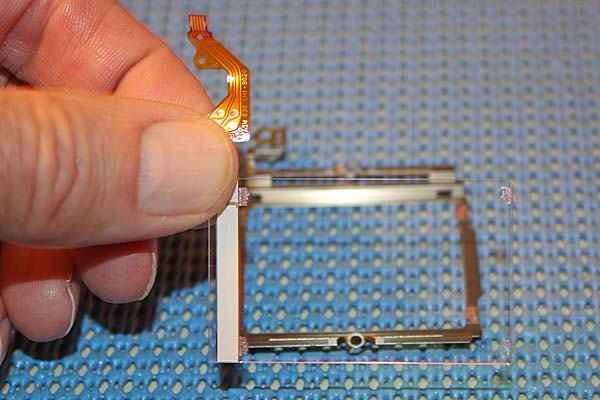
Continue with steps on next page