
by Gary Honis DSLR Modification Service
The Honis "Ground Control" system provides complete wireless control of telescope operations available on the wired hand controller. No more wondering where to hang or place that wired hand controller. Allows freedom to move around and away from the telescope during operation. Cable and connector problems with wired hand controller from repeated use and stress are avoided. Honis "Ground Control" is 100% compatible with original wired hand controller. The original wired hand controller remains completely functional and can still be used at the same as the wireless remote controllers.
UPDATE: New "Ground Control" systems for Starmaster Telescopes equipped with Sky Tracker GOTO are no longer available. These web pages are being maintained for existing owners and I will continue to maintain service support for existing customers.
Easy Plug & Play Installation
CLICK HERE for a high definition 10-minute You Tube Video of the Honis "Ground Control" system for Starmaster GOTO telescopes.
Starmaster
Operation:
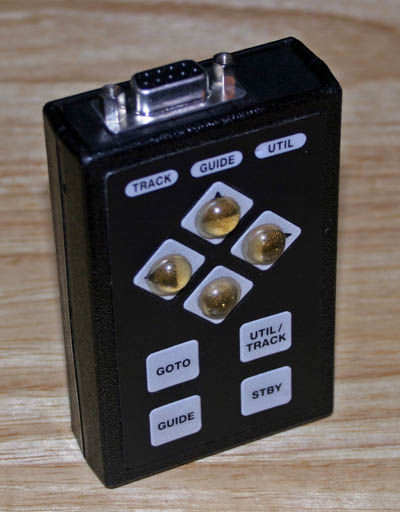
Wireless "Ground Control" Remote Controllers have eight control buttons that function in the same manner as the original Sky Tracker wired hand controller:
1. Up
2. Left
3. Right
4. Down
5. GOTO
6. UTILITY/TRACK
7. GUIDE
8. STANDBY
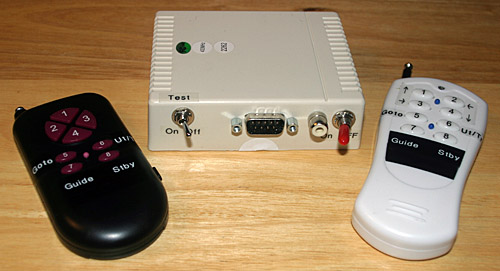
Two wireless remotes are provided with the system, one black and one white. Both remotes come with 12 volt batteries (23A) included. The remotes and receiver come pre-encoded to one of over 6000 codes to avoid interference with other wireless systems. Both wireless remotes can be used at the same time to control the telescope.
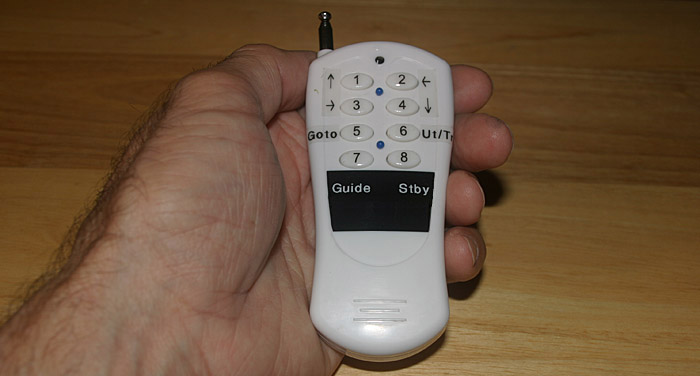
Black Remote:

The black remote has four directional buttons on the top and four function bottoms on the bottom. There is a "feeler" bead between the four function buttons to help locate them in the dark "by feel". This remote also has an on/off switch. There is a dim red light indication when a button is pressed and a signal is being sent. Dimensions: 4"x1.75"x0.5"
White Remote:
The white remote is a little larger than the black remote. It has two columns of buttons. The top set of four buttons are the directional buttons and the bottom set of four are the function buttons. There are two "feeler" beads located between each set. There is a dim red light indication when a button is pressed and a signal is being sent. Dimensions: 5"x2"x0.6"
Suggestion: Keep one remote near the focuser; the other on your observing table.
Wireless Receiver:
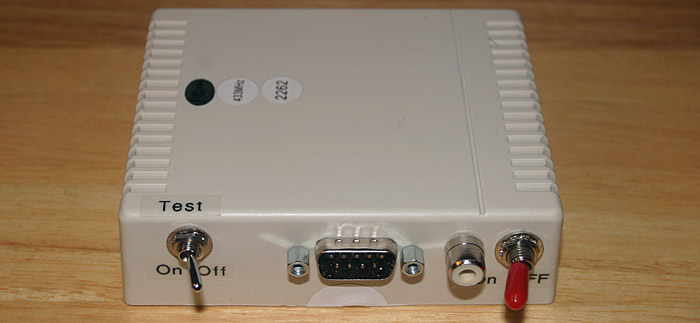
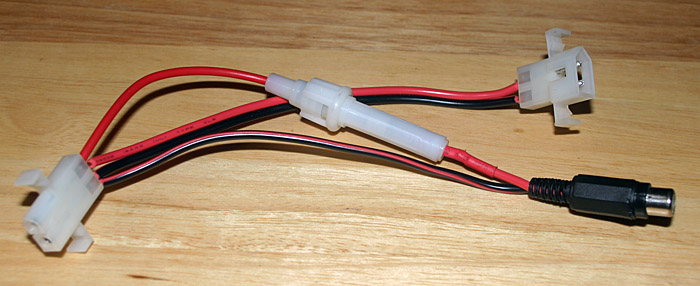
Powered by the telescope's 12V DC system. The receiver can be located anywhere on or inside the telescope. An RCA cable and splitter cable are included for powering the receiver from the telescope battery. Connection of the receiver to the Skytracker hand controller is by secure DB9 cable connections.
Dimensions: 4"x3"x1.1"
Skytracker Hand Controller Modification:
You will need to send me your Skytracker Hand Controller (only) for modification. A female DB9 connector will be added to one end as shown in the photo above. (note: The raised directional buttons (bumps) are not part of the modification)
Addition of the DB9 connector does not affect functioning of the original Skytracker Hand Controller in any way and it can be used in the same manner as before the modification. The original Skytracker Hand Controller can also be used to control the telescope at the same time as the two provided wireless remote controllers.
Telescope Installation:
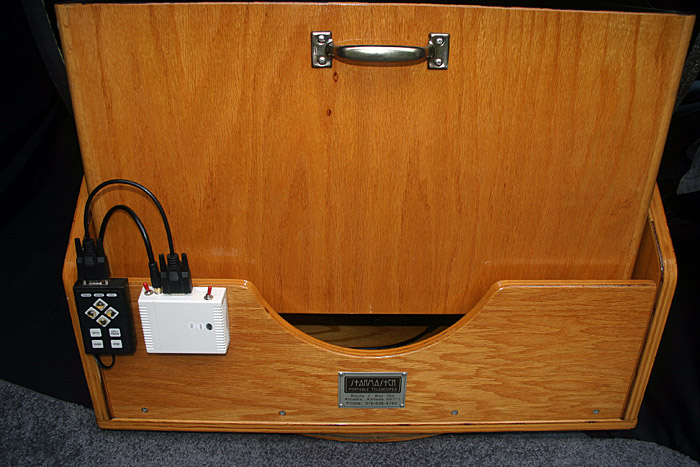
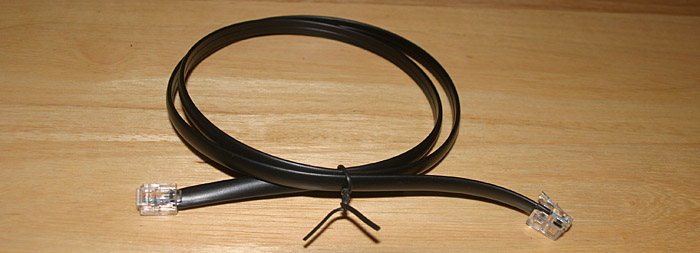
All hardware and cables are provided with the installation kit. The wireless receiver can be located anywhere on the telescope. One location, at the bottom of the rockerbox, is shown in the photo below. The Skytracker Hand Controller is connected with the provided telephone type cable to the "Hand Controller" port of the SkyTracker unit. The modified Skytracker Hand controller is connected with a DB9 cable to the wireless receiver. The wireless receiver is powered with a supplied RCA cable and splitter from the telescope battery. The drive speed LED lights on the Skytracker hand controller can be seen at the eyepiece from most positions of the telescope.

Another possible arrangement is to mount the receiver and hand controller using the provided velcro to the outside of the rockerbox as in the photo below: (20" telescope in photo)
Accessories provided with system:
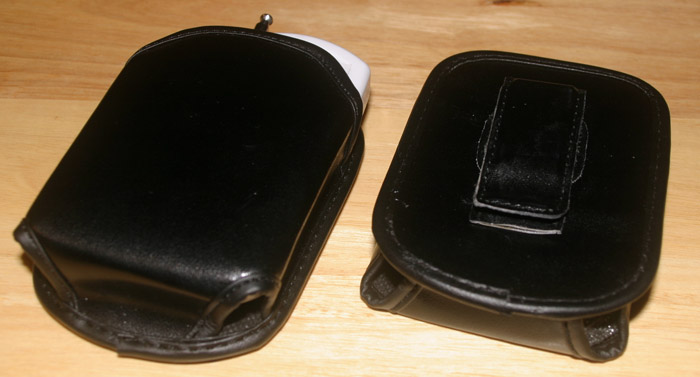
1. Case with belt clip for black remote:

2. Case with belt clip for white remote:
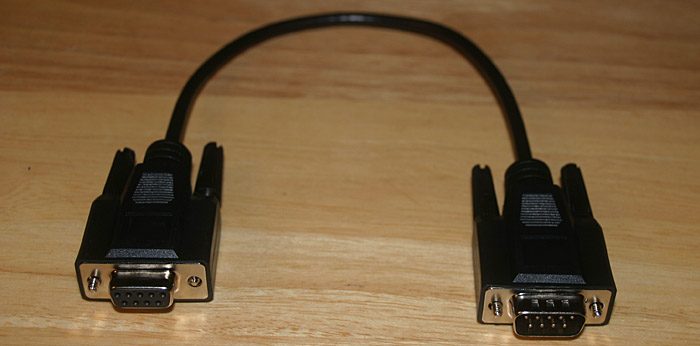
3. One foot DB9 M/F cable for Wireless Receiver to Skytracker Hand Controller connection. (Please email if you would like a longer DB9 cable)
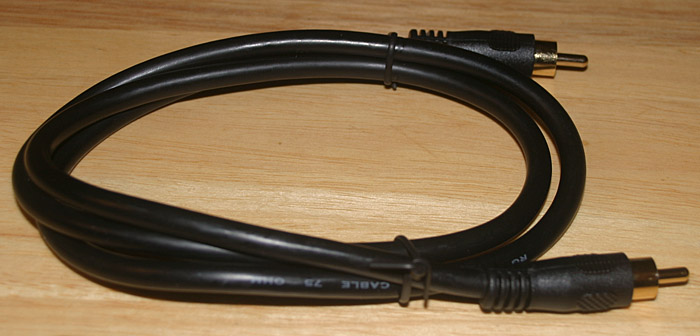
4. Three foot RCA M/M cable for power to receiver:
5. Fused power cable splitter for powering receiver and telescope from standard Starmaster battery connector:
6. Telephone style cable for Skytracker Hand controller connection to main Skytracker unit:
Ordering:
Price: $275 plus $20 shipping, UPS ground insured continental United States only. You will need to send me your Skytracker Hand Controller (only) for modification. The modification involves the addition of a female DB9 connector. Please email or call for shipping instructions and scheduling the modification. The modification can be completed in one business day for quick turn-around and delivery of the complete wireless system. A one (1) year warranty is provided.
Personal check, money order or bank check accepted and can be sent with your original Skytracker hand controller . Please allow up to five business days for personal checks to clear.
Payment by Credit Card: If you prefer to pay by credit card, I will email an invoice to you for making payment using PayPal.
Contact me at :

or by phone: 570-788-3446.
When you place the modification order you will be agreeing to this: See Disclaimer
CLICK HERE for 10-minute You Tube Video of the Honis "Ground Control" system for Starmaster GOTO telescopes.
CLICK HERE for installation notes shipped with the wireless system.
Testimonials:
Gary,
I just wanted to let you know that I have used your system to great satisfaction and hope that I will be using it much more after the first of the year when I retire. The system arrived intact. Was very straight forward in hooking up and worked immediately. The buttons on your remotes are great even for fumbling fingers. It is a pretty slick addition to the scope and will be particularly helpful to me.
I simply velcroed the system into the bottom of the rocker box, put the small remote in my pocket and go see things. Out of sight, out of mind. The buttons on the remote work great in the dark. And no tripping or winding myself up in wires!
Thanks,
David Dine
CLICK HERE for more testimonials on my Modification Service.
Adding a mini-computer (netbook) to your Starmaster? Instructions for building a low cost and light weight mount can be seen HERE.
To My Astrophotography & Digital Imaging Home Page
Gary Honis DSLR Modification Service
This device complies with Part 15 of the FCC Rules. Operation is subject to the following two conditions: (1) this device may not cause harmful interference, and (2) this device must accept any interference received, including interference that may cause undesired operation. The user is cautioned that changes or modifications to this device could void the user's authority to operate the equipment.
Caution:
Changes or modifications to this unit not expressly approved by
the party responsible for compliance will void the user’s
authority to operate the equipment. Any change to the equipment
will void FCC grant. Note: These limits are designed to provide
reasonable protection against harmful
interference in a residential installation. This equipment generates,
uses and can radiate radio frequency energy and, if not installed
and used in accordance with the instructions, may cause harmful
interference to radio communications. However, there is no guarantee
that interference will not occur in a particular installation.
If this equipment does cause harmful interference to radio or
television reception, which can be determined by turning the equipment
off and on, the user is encouraged to try to correct the interference
by one or more of the following measures:
—Reorient or relocate the receiving antenna.
—Increase the separation between the equipment and receiver.
—Connect the equipment into an outlet on a circuit different
from that to which the receiver is connected.
—Consult the dealer or an experienced radio/TV technician
for help.
Modifications not authorized by the manufacturer may void users
authority to operate this device. This device complies with part
15 of the FCC Rules.