The C2000Z is capable of 32 second exposures using a trick as explained on my site at Part 4
The Click HERE for Sequential Mode Shutter Cable Modification.
MODIFICATIONS FOR AIR COOLING:
STEP 1 - For disassembly of an Olympus C2000Z see Part 6
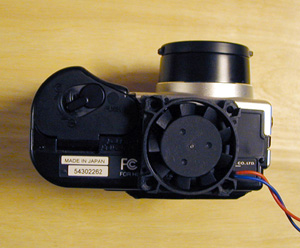
Follow the directions for disassembly of the C2000Z; the procedure would be similar for the C2020Z. The disassembly procedure allows removal of the camera's tripod connector to create an opening for air intake.
STEP 2 - Mounting the fan
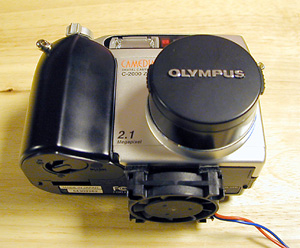
A small 12 Volt DC fan was mounted over the opening in the camera's body resulting from the procedure in STEP 1 above. The fan I used was obtained online for $5.95 at: http://www.mpja.com/product.asp?product=9113+FN

The fan was mounted over the air intake hole using small squares of velcro. This fan is very vibration free and the velcro squares provide additional isolation. This is the same fan I used for a peltier cooled quickcam. This size fan fits well on the camera body and provides good air circulation for cooling. The velcro allows removal of the fan for non-astro imaging for use as a normal camera. I obtain 12 Volts DC from the accessory panel on my 20" GOTO Starmaster telescope.
Bottom and Front View of the camera with fan mounted:
 <White streamers show force of airflow out of camera body
Initial Test Results:
My initial test results are from images taken indoor of dark frame noise. A summer heat spell provided an ambient temperature of 78 degrees fahrenheit, a worse case temperature for nighttime imaging. Below on the left is the dark frame from a 16 second exposure with the fan off and the same length exposure dark frame on the right was taken after three minutes of air cooling with the fan on:
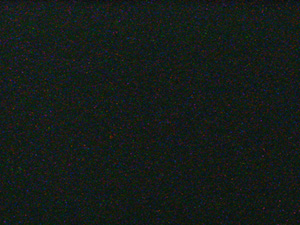 <fan OFF
 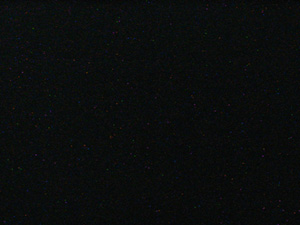 <fan ON
Based on these initial results, it appears that even a minor amount of air cooling provides improvement in noise reduction. The camera's CCD chip and electronics generate heat that is normally trapped in the camera body. The heat and noise is increased if images are taken with the camera's LCD display turned on during image aquisition. Hence, the LCD display should only be used for focusing and other menu changes prior to taking an exposure. Also, it is helpful to keep the two side doors (jacks and smartmedia) open to allow for air escape from the camera body.
All of the deep sky images I have taken to date were without this air cooled modification (See previous Parts 1 thru 6 ). The noise in these non-aircooled images was not too bad in less than 50 degree fahrenheit ambient temperatures, so I am anxious to test the air cooled camera on some 32 second deep sky exposures and will post the results here.
PELTIER COOLING:
If I am not satisfied with the results of air cooling, I may attempt peltier cooling. My thoughts on this are discussed in PART 6 under "Peltier Cooling".
Warning!!!! The modifications on my site will most certainly void your warranty from Olympus. After disassembly, reassembly and fan cooling my camera functioned properly, but your camera may not.
Initial Deep Sky Images:
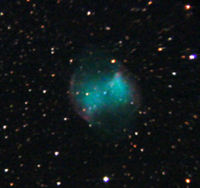
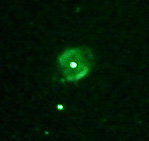
The first results of deep sky imaging with the air-cooled modifications are promising. For images of M27, Dumbell Nebula, made with 32 second exposures and an ambient temperature of 58 degrees fahrenheit, CLICK HERE.
Second Time Out:
For many more deep sky images using the air-cooled C2000Z, CLICK HERE.
TO PART 8 - AIR-COOLED C2000Z LATEST IMAGES
TO PART 6 - DISASSEMBLY INSTRUCTIONS FOR C2000Z
TO PART 5 - 32 SECOND IMAGES WITH C2000Z
TO PART 4 - DEEP SKY IMAGING - LONG EXPOSURES
TO PART 3 - DEEP SKY IMAGING ON 10/31/00
TO PART 2 - DEEP SKY IMAGING ON 10/20/00
TO PART 1 - DEEP SKY IMAGING WITH 2X BARLOW
 For images taken
with the C2020Z and a Collins I3 Image Intensifier Eyepiece Click Here
For images taken
with the C2020Z and a Collins I3 Image Intensifier Eyepiece Click Here
TO MY DIGITAL CAMERA IMAGING HOME PAGE
TO MY MAIN ASTROPHOTOGRAPHY PAGE