32. Begin to reinstall circuit board by inserting the two bottom ribbon cables into the hinged type connectors. Refer to the close-up photo in step No. 21 and be careful inserting the larger ribbon cable into the proper location on the connector.
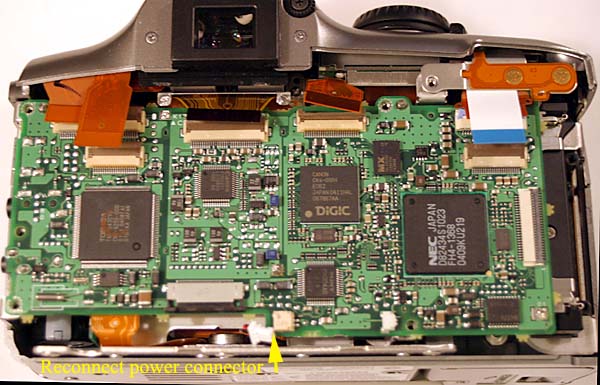
33. Now swing the board upward and under the top six ribbon cables and align board with the two top mounting pins that go through holes in circuit board. Reconnect the power connector at the bottom of the camera that was disconnected in Step 22. Tweezers are helpful for this.
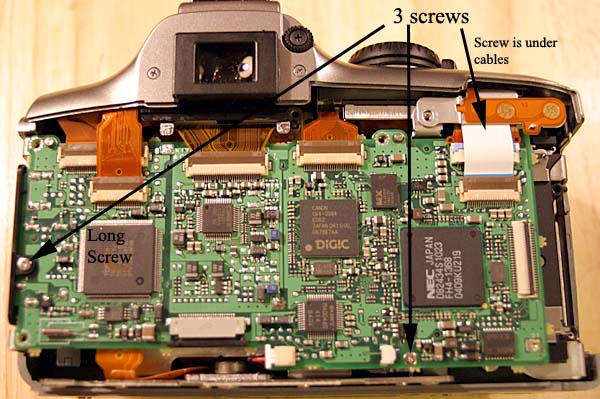
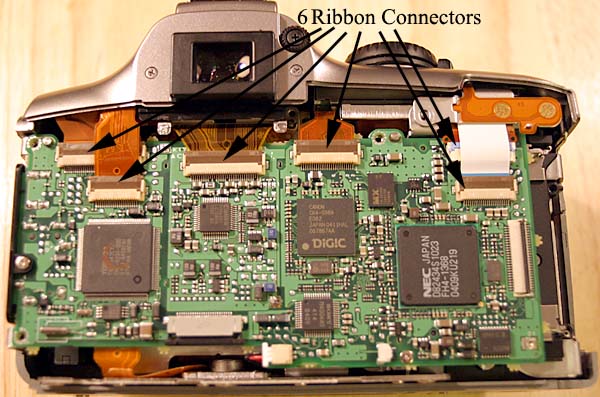
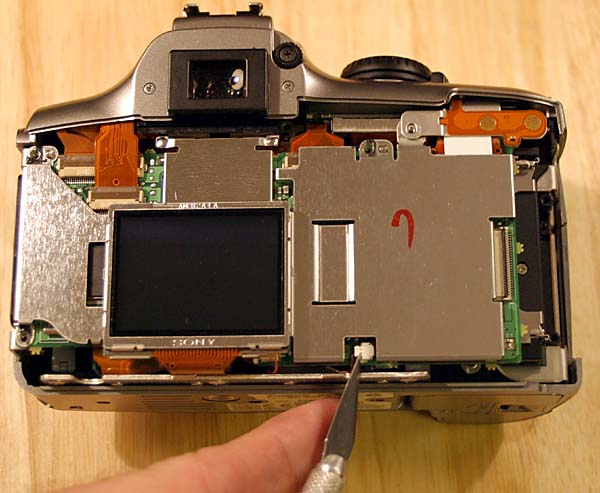
34. Install three screws as labeled below. One screw is under the white ribbon cable in upper right and cable needs to be held vertical and out of the way to install this screw. Also, the screw on the left is the longest of the three screws and is used to mount the black plastic port cover. Connect the remaining five ribbon cables using toothpick in the ribbon holes.
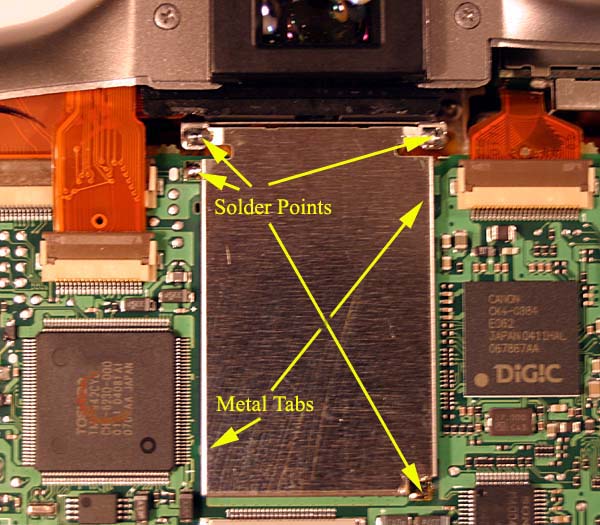
35. Install the metal shield by placing the two tabs into holes in the circuit board and soldering at four locations:
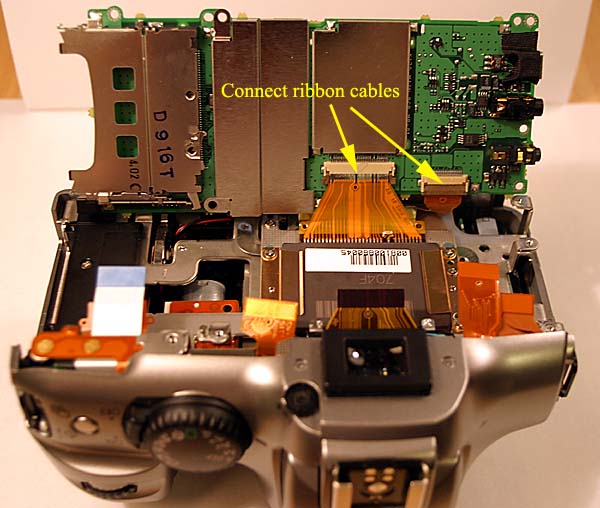
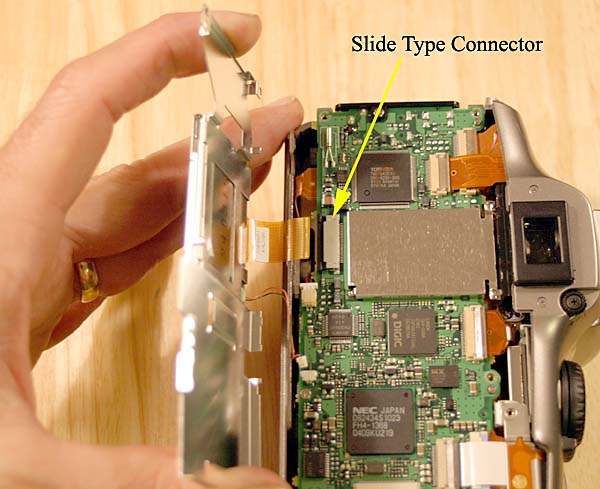
36. Place ribbon cable in slide connector and press black slide tabs on ends of connectors with jewelers screwdriver to lock cable in place:
37. Use tweezers to insert male connector into female connector on board for LCD power. Push in fully with jewelers screwdriver until it snaps into place:
Continued on Next Page (Page 7) - Disassembly of Camera Continued